RecyclerView : Keep It Simple, Silly

Kirtan Thakkar
Life is all about learningRecyclerView is a more advanced version of the ListView. RecyclerView is used for displaying large data sets that can be scrolled very efficiently by maintaining a limited number of views. To build a small list in RecyclerView, you need to write a lots of code. I have been using RecyclerView from almost 3-4 months, but everytime I just copied the code to get it work. It worked most of the time, but I never understood the code how it works. So when I watched this year’s I/O 2016 for RecyclerView I understood the basics why I need to write that much of code and how it works. It looks complex, but it isn’t.
So firstly, I suggest you to have a look at this video to get the basic understanding of RecyclerView. Then, we will code a simple RecyclerView for a list of 100 items.
So now, you know what are the basics of RecyclerView. I know you haven’t watched the complete video and you want to get started quickly with the RecyclerView to get it working. That is what I did exactly when I started.
Let’s understand the portions we will use in the tutorial. LayoutManager, Adapter and RecyclerView.
LayoutManager
- Positions the items
- Scrolling
- Focusing
Adapter
- Creates view and view holder
- Bind an item to view holder
- Notify RecyclerView about changes
- Notify data out of sync
RecyclerView
- This is the boss.
- Interacts between everything connected to it like LayoutManager, Adapter and ItemAnimator.
If you don’t know about the ViewHolder pattern, it is as simple as it’s name suggest. A ViewHolder describes an item view and metadata about its place within the RecyclerView. It basically eliminates the expensive findViewById() calls. You will understand from the example we are going to discuss.
Let’s start with the code, so that you can write a new RecyclerView without copying your previous one.
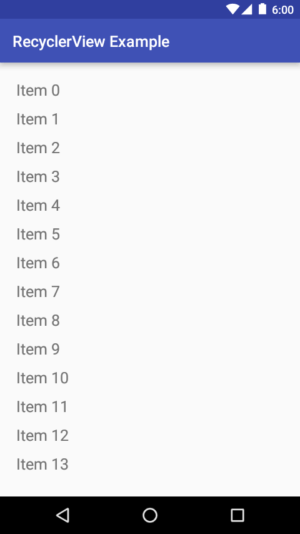
In this tutorial, we will create a simple list with 100 items.
Let’s Code.
- Step 1: First things first. Add RecyclerView’s dependency in your
build.gradlefile of the app module. (Add the shown line in your dependency section, other dependencies may vary)
- Step 2: Now declare RecyclerView in your activity’s layout file.
- Step 3: Create a Layout File for a single item shown in a RecyclerView. This layout will be used for each item in RecyclerView.
- Step 4: The most important step. After declaring it in layout file, we need to add data on Activity’s
onCreate()method. Now here we need to use 3 classes.
RecyclerView– This is the bossLinearLayoutManager– Positions the viewsRecyclerView.Adapter– Provides the views
We will create our Adapter Class TestAdapter by extending RecyclerView.Adapter. This is necessary to provide any data to RecyclerView.
We will create a LinearLayoutManager‘s object and tell it that this is a vertical list. So, this is your (LinearLayoutManager's) duty to show views in that manner.
Look at the Activity file and we will discuss more after it. Read comments to get more idea.
Comments say it all. Now let’s talk about how the Adapter (TestAdapter class) works here. We created an ArrayList of String to be shown in the RecyclerView. Passed it to the TestAdapter‘s constructor.
onCreateViewHolder will be called whenever there is a requirement to create a View for our List. Only few views are created which will be needed on user’s screen and view will be recycled to show the new content when the list is scrolled.
So, whenever a view is scrolled out of the user’s screen it will be recycled and that recycled view will be used to show the data of the item which is being coming in on the user’s screen. This is why we call it RecyclerView. Because, it doesn’t create and store each and every view for all the list items in memory. It recycles it and keeps only few of it in memory.
onBindViewHolder – So, whenever a new item is coming in the screen onBindViewHolder will be called to bind the data to the view for that position. The view used to bind the data may be a newly created view or the recycled view. onBindViewHolder will be used for binding data for a single position to your view, which is a simple TextView in our case.
TestViewHolder holds the reference to TextView from the rcv_viewholder.xml file. TestViewHolder is the ViewHolder pattern we talked earlier. It holds the reference of the TextView in our case, so that it can be used without calling expensive findViewById() everytime we need to use the TextView to set the list item data.
getTestListItems()is the helper function which provides the list of 100 items.
That’s it. Your simple RecyclerView is ready to perform. You can also use more complex views. We have used a simple TextView and String data to get you started. You can use different types of layouts, list of custom objects rather than String, horizontal linear layout instead of vertical etc.

Simple RecyclerView
This project is also available on github here. So clone or download and start playing with it.
Have any questions? Comment below.